How to sit on the twine. How to do splits very quickly and easily at home in a short time for beginners: a set of exercises, instructions and a training program for stretching legs to do splits from scratch with tips and a video master
According to fitness trainers, almost any healthy person can train the muscles of the hip part of the body and quickly enough to sit on the twine with the proper desire for training and the absence of contraindications.
The main thing is a qualitative approach to training, because the results depend largely on how correctly the stretching is done, how the muscles of the pelvis and thighs are trained. To quickly sit on the twine, first of all, you need regular training and determination.
How long does it take to train to sit on the twine
If you have a good stretch and experience in sports, it will be quite easy to sit on the twine. Absolute beginners in sports without proper physical training, will have to work longer and harder than people involved in some kind of sport on a regular basis.
How quickly a person sits on a twine is influenced by some factors
Exist factors affecting physical state human body, which should be considered when drawing up a training plan to sit on the twine:
- genetic predisposition- innate flexibility of the body, which depends on the length of the ligaments, the number of sarcomeres and elastin in the muscles.
- Frequency and duration of joint warm-up before training, as well as the correct technique for performing training in order to sit on the twine.
- Training diary, thanks to which you can monitor your development, not only psychological, but also physical.
- correct healthy eating , which should include a sufficient amount of water, calculated on the weight and age of the person.
When flexibility is achieved, there is a change in muscles, joints and ligaments. This, of course, takes time and effort. Therefore, one cannot hope that you can sit on the twine in a day or even in 1 month.
 Stretching doesn't have to be painful.
 Exercise should not be done through pain. Basically, those who already have good flexibility or children sit down during the day, since their body is not fully formed.
But still I want to know how much time it will take to train and whether it depends heavily on age. Experts say that if you start exercising before the age of 30, then basically regular classes takes 3-5 months. People over 30 will need more than six months of intensive training.
These figures are calculated for people with average physical data. The timing will be affected only by the degree of flexibility, patience and attitude.
Effective stretching exercises to sit on the twine
The main purpose of stretching is to make muscles elastic, joints more mobile and give tone to the body.
Stretching also improves blood flow, promotes the supply of oxygen and nutrients to the muscles, protects the body from the occurrence of chronic diseases and pain in old age.
- Worth starting with sit-ups for leg muscle development. First you need to put your feet slightly wider than your shoulders, your back is even, your gaze is directed forward.
When a sitting is done, you can bring your arms forward, but most importantly, take your pelvis back, as if there is a chair behind you. It is necessary to ensure that the knees do not go beyond the foot, otherwise there will be a large load on the joints.
 One of effective exercises stretching - leg swings that can be performed both to the sides and back and forth
 - Second exercise - swing your legs. Mahi can be performed to the side, forward, backward, lying on your side and sitting on all fours.
When performing, the back and legs should be even, if swings are made to the side, then there should be a support that you can grab with your hand.
- Required slopes for stretching ligaments.
The legs are shoulder-width apart, bending over, hands reach first to the right toe, and then to the left. The knees are straight and do not bend. Everything is done smoothly and no sudden movements.
- Support exercise. First you need to rest your hands slightly above your head against the wall.
Bend the right leg at the knee to a right angle, and holding the other leg straight, take it back as far as possible. So they will stretch calf muscles.
 Support exercises - one way to do stretching to sit on the twine
 - Stretching is promoted and side-to-side leg extension. First, the legs should be placed shoulder-width apart, while the back should remain flat.
Then you need to take your leg to the side, the pelvis is parallel to the floor. Hands in front, then tilt the body to one leg, and then gradually align the legs at the knees, and stay in this position for 20-30 seconds.
After the exercise, you need to do it on the second leg.
- Exercise for half twine on the back. You need to lie on your back and put your hands along the body. One leg must be bent for support, and the other should be extended and taken with your hands.
The leg should be straight so that the pelvis does not go to the side.

- IN next exercise you need to kneel and put forward one leg, bent at the knee at a right angle.
For balance, you can grab a chair with one hand. Next, the second leg is taken by hand and reaches for the buttocks.
- To stretch the back of the thigh, you need to kneel and stretch the other leg forward without pulling on the toe.
Then gradually with your hands you need to reach for the toe, the knee should not bend.
How to do a stretch to sit on the twine
Stretching is the key to maintaining joint flexibility and health. Tendons (tissues that connect muscles to bone) begin to shrink and tighten as you get older, limiting your body's flexibility. The movements become slower, it is already difficult to stand straight, even the step becomes much shorter.
Correct technique is of great importance. In the parks, runners can be seen stopping to stretch the front of the thigh, pulling the leg to the buttocks. Such a stretch can only hurt.
There are basic rules on how to stretch in order to sit on a twine, adhering to which you can achieve good results rather than hurt yourself.
So, stretching rules:
- Stretch as often as possible preferably daily if possible. Always after cardio and strength training.
- Before stretching, be sure to forget about a small warming up the muscles.
- In every position gotta move slowly without forcing yourself to make sudden movements. Always pay attention to tension.
Stretch should be measured from mild tension to the edge of discomfort. You need to focus on the area that is being stretched.
- Before holding each position, you must take at least two deep breaths. Deep breathing promotes relaxation.
- In no case can't bounce. Once you have found a comfortable stretching position, you should stay in it and gradually stretch more.
How to sit on a transverse twine
You can also achieve results at home. It all depends on the lifestyle, activity of a person and his diet.

You can start your day with a morning workout, since it is in the morning that the muscles are stiff, and the effect will be better. To implement the twine, you must have a strong back and abs, so strength exercises are needed 2-3 times a week.
If all of the above is observed, then the result will not be long in coming.
First you need to warm up with a warm-up. It is advisable to start from the neck, then go to the arms, back and do not forget about the legs.
After that, you need to perform the following exercises:
- Deep tilt with support on the hands. The back should be straight and relaxed, breathing free.
In this position, you need to be 30-60 seconds. As soon as you can lean on your palms, you should try to stand on your forearm.
- The next pose is a stupa. The legs are spread wider to the sides, the arms are extended upwards. Gradually you need to go down, spreading the same knees and hips.
- Push ups. The legs are wide apart to perform push-ups by bending the elbows while the pelvis is pulled forward just above the head. On exhalation, return to the starting position. Repeat this exercise 10-15 times.
- Twine preparation. The legs are placed wider, the body is parallel to the floor, you need to stand on the forearms or palms. Stay in this position for 30 seconds.
Twine trainer
Performing stretching exercises, both for the profession and for health and beauty, obliges a person to do them with patience, endurance and perseverance.
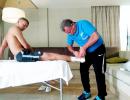
 To facilitate the process in order to quickly sit on the twine and not damage the muscles, a special simulator will help.
How does he work? The simulator is designed specifically for stretching muscles, as well as for fixing them. Thus, the muscles get used to and gradually stretch without much pain. The simulator has its pros and cons, which must be considered when buying it.
Pros:
- By adjusting the degree of stretching, the pain will not be so noticeable, and the legs will be in a comfortable position. In this case, the load on the legs will decrease.
- You will no longer have to be afraid to injure muscles and ligaments. Exercises on the simulator pass without sharp jerks and sloppy movements.
- Most models of simulators are designed for stretching while lying down, that is, the muscles will be as relaxed as possible, which contributes to quick results.
Minuses:
- The trainer is expensive. Its minimum price is 2-3 thousand rubles.
- If a person is on constant trips, then the simulator will have to be left at home, since it is quite difficult and inconvenient to transport it.
- A good stretch and split will not come in a month for beginners. This process is quite labor intensive.
The dangers and cons of quick twine without a warm-up
Most sites promote fast splits in a month, a week, a day, and even an hour! For beginners, it usually happens like this: a large krepatura, which complicates training, and an insignificant result.
To achieve the goal and sit on the twine, the following errors should be considered:
 The load during the warm-up can be different, for example, cardio exercises will be quite effective, which should last at least 15 minutes.
 - The first and most common mistake made by beginners is short warm-up, which does not contribute to a good warm-up of the muscles.
The load can be any: cardio, jogging, skipping rope, dancing. Duration - 15-30 minutes. This will make the muscles soft, pliable and more flexible, which will prevent training pain.
- Many, starting to work on themselves, overdo it with the load. Yes, a new business and a goal inspire, but it is very important at first to give yourself a minimum of workload, there is no need to rush, you need to gradually complicate the process.
- Plays a big role class schedule. Stretching requires discipline. You should do at least 3 days a week, if one day was missed, then it must be compensated.
- Most people do not know the anatomy of their body and start looking for what you can faster exercise for stretching to sit on the twine in a few workouts.
This is their mistake. Not all exercises are really useful and doing them without knowing which muscles they affect is really dangerous. You need to pull only certain muscles, observing the technique.
The trainer of the stretching studio told how to stretch to sit on the twine and achieve results even at home.
Training is important, but it is not necessary to attend intensively. 2-3 days a week will be the best option, otherwise the muscles simply will not have time to recover.
In no case should you invent "your" exercises- it could end badly.
Don't Forget the Warm Up, on which the twine itself depends. Pay attention to the stretching of the lumbar.
Do not be afraid of krepatura and skip classes because of it, after a warm-up, the pain will subside. You can also reduce it with a hot bath or shower after a workout.
How to stretch to sit on the twine:
How to sit on the twine - beginner mistakes:
Try these exercises for doing the splits. Deep yoga split stretch for perfect splits that will heal your body.
Many people think that they will become less flexible with age, although in fact this idea is far from the truth. In your 30s, 40s, and even older, you can still do the splits, as long as you do yoga-style split stretching exercises daily.
Stretching is an essential part of any workout. Studies have shown that they help increase flexibility and help maintain fitness, reduce the risk of injury by improving blood flow to the muscles, and also relax the body. They are also useful for stretching the muscles, giving the body a slender and toned look.
So how come find out how flexible you are? The answer is obvious - of course, twine! Don't panic ahead of time. I promise that you will slowly and confidently sit in this pose. Try the five stretches I suggest below!
1. Forward bends
Stand straight, feet together, arms at your sides. Stretch your arms forward, lift above your head, then stretch your chest and arms down. Let your fingers or palms slide over your legs and then slowly draw your chest towards your knees. If you have trouble reaching your toes, bend your knees slightly until you can reach the floor with your toes. Pull your chin and chest towards your knees and hips for maximum stretch. Remember to keep your knees together and slightly bent to avoid injury.
Stretching the hips and back relieves anxiety, relieves headaches, improves digestion, and frees the mind.
2. Pose of the pyramid

Start in tadasana or mountain pose (stand straight, feet together, arms close to sides), place one foot 90-120 cm apart from the other, foot slightly turned outward, heel of the exposed leg facing the heel of the skating leg. Note: it is important that the legs Not stood in one line. The hind leg should be set a few centimeters back in order to maintain balance. Once you have placed your feet correctly, slide your fingers along your front leg and lower your chest to your thigh. Stretch your toes forward of your front leg for more stretch.
Stretches the back, shoulders, wrists, hips and strengthens the legs. Improves posture, balance, calms the brain.
3. Lizard Pose

Step into a low lunge with your supporting leg bent (reaching forward), knee bent so that it is level with the ankle, and the other leg extended back. The knee of the leg that is lowered to the floor behind you, in a relaxed state; stretch your arms out in front of you.

From this position, begin to reach for the floor, leaning on your forearms and bending your chest to the floor, head and heel of the leg, which is pulled back from behind. You can add variety to this pose by placing something under your arms.
Stretches the hips, hamstrings, groin, abdominal muscles, shoulders and neck. RevealedchestcellAndlungs.
4. Dove Pose

In a sitting position, extend your right knee, leaning on one leg. Then, rotate your knee so that it points to your right wrist and your ankle to your left, trying to keep your shin parallel to the floor or mat.

Lower your hips and torso to the floor, stretching left leg, which is pulled back. If this is too painful or uncomfortable, pull your right ankle towards your body so that the ligaments relax slightly.

Once you are comfortable, reach forward with your fingertips and lower chest towards the floor.
The hips, groin, abdominal muscles, chest, shoulders and neck are stretched. The abdominal organs are stimulated. Opens the chest and shoulders.
5. Pose with a wide step

Sit down, stretch your legs in front of you, hands behind your back, spread your legs as wide as possible. From this position, place your hands in free space in front of you, stretch them forward until you feel that you can’t go any further.

Once you have reached your maximum, try to bend your chest and head towards the floor.

Also useful to stretch each leg separately while in this position. To do this, with your left hand, stretch over your head to your right leg, trying to reach your toes with your fingers. Hold this position for 8 breaths.

Then, turn your head and chest so that your torso is facing your right leg and stretch your nose towards your knee. Again, hold this position for 8 breaths, and then repeat the same for the other leg.
Stretches the back, inner and rear end legs. The organs in the abdominal cavity are stimulated. The groin area is relaxed.
How to sit on the twine at home! A set of exercises for stretching
We stretch on the transverse twine
So now, yogis, you have my secrets for the perfect split. Keep stretching and I promise you will be doing splits very soon! And remember - the more flexible you become, the less chance life has to unsettle you. Until next time and good luck.
According to materials:
http://www.sheknows.com/health-and-wellness/articles/1017811/5-stretches-to-master-the-splits
Stretching - it is a human achievement that requires long-term training. Flexibility allows you to adjust your gait, pump up your legs, and avoid muscle damage during a fall or injury. Twine will help to cope with muscle stretching best of all. Let's talk about how to quickly sit on the twine at home, while not damaging muscle tissue.
The main thing in the article
Why sit on the twine?
For many, stretching is not a priority, but in vain. After all, the ability to sit on a twine is an indicator of the high elasticity of tissues. Answering why this is necessary, here are the main arguments:
- Posture improves. Flexibility is the direct path to beautiful posture and smooth movements, as working on stretching, you strengthen the spine. An additional plus is the reduction of back pain during exercise.
- Endurance develops . Since the desire to sit on the twine alone is not enough, endurance, perseverance, the ability not to give up, and self-control are “brought up” during training.
- Joints are strengthened . Their mobility becomes higher. Such classes are recommended for women who are planning their subsequent pregnancy, since the birth process in women with a good stretch is much easier.
- INs acts as a preventive measure. When exercising, blood circulation improves, which at times reduces the risk of developing varicose veins and congestion.
- Self-esteem rises. Having set such a sports goal as splits, many, having reached it, look at the world a little differently, as their self-esteem increases significantly.
Experts say that classes that allow you to sit on the twine are the prevention of scoliosis, improve blood circulation in the pelvis.
How to properly sit on the twine?
 To sit on the twine without unnecessary injuries, you should do the exercise and organize classes correctly. They must be carried out, taking into account the following rules:
- Workouts should be daily. preferably in the morning and evening. If this pace is unacceptable, then training should be carried out at least 4 per week.
- Stretching exercises should not be carried out immediately, as Before stretching the muscles, they must be warmed up. more light exercise. For these purposes, cardio exercises are excellent.
- Ligaments should be warm, therefore, when conducting classes, despite the weather outside, it is better to wear leggings that will help avoid stretching, and when exercising in a cold room, they will contribute to warming.
- When conducting classes, keep in mind that half of the exercises should focus on dynamic stretching(swing your legs) and the other half are static postures(leg extension with fixation), which help to fixate stretched muscles. In order to reduce pain during exercise, try to relax completely.
- Watch your breath is an important part of training. Breaths should be deep, without delay. Pay attention to the back, it should be flat.
How to quickly sit on a twine for a beginner?
What needs to be done to sit on the twine from scratch in a short time?
If you are a beginner and want to do the splits from scratch, they will help you develop the desired flexibility systematic studies. They should be done at least 4 days a week. Lessons should include:
- up to 15 minutes of warm-up;
- 30 min stretching exercises.
- Do it better in the evening , since the muscles after the loads of the day are more disposed to stretching exercises.
- Warming up is required condition for effective practice. For a warm-up, jogging, squats, jumping rope are suitable.
- For easier stretching, you can use a hot shower 10 minutes before training. This contributes to a better warm-up of the muscles.
- Clothing should be comfortable to stretch with you. It is unacceptable that a sports suit pinches blood vessels and is tight.
- After your workout, do leg muscle massage. So they will calm down and will not “wine” much.
You need to perform classes with the utmost care, checking the condition of your muscles and ligaments. If you experience pain, an unnatural crunch, a burning sensation, stop stretching, as you may be injured.
Is it possible to do the splits in a minute, a day or a week?
 Many methods claim that you can sit on the twine in 1-3 days. Is it so? Physiologically, this is possible, but such experiments will be accompanied by sprains or torn ligaments. Even the greatest flexibility obtained from nature requires regular preparation before the splits.
Fairy tales about "sit on the twine in a minute" are unrealistic. Even sitting on the twine in 1 day is impossible !!! Therefore, do not risk your health, do your workouts correctly and then you will be able to “conquer” both longitudinal and transverse twine without any problems.
As for the period per week, this is real only for those people who have been involved in any kind of sports or dancing, in which stretching exercises were present. Such athletes, if they set themselves the task of doing the splits, can cope with it in 7-10 days.
Which twine is easier to sit on?
A lighter type of twine is considered longitudinal. It is performed as follows: one leg is in front, the other behind, as if continuing each other. It is more difficult to cope with the transverse twine, which involves spreading the legs in different directions. For beginners, it is better to start training with longitudinal stretches, gradually adding load, switching to transverse twine.
How long does it really take to do the splits?
 The real time for which you can stretch the muscles without harm and damage can be called month, but subject to moderate daily exercise. Below we have put together a few sets of exercises that will help you get good stretch within the minimum reasonable time.
What exercises should be done to stretch the muscles of the legs and how often?
So, as mentioned above, training includes two types of exercises that should be given the same amount of time:
- Dynamic are movements that are repeated. When they are carried out, the movements are performed a certain number of times.
- Static - movements are not carried out here, parts of the body are motionless, but the position causes the muscles to stretch.
To achieve the goal, the frequency of exercise can be daily or at least 4 times a week.
How to painlessly sit on a twine in a month: a set of stretching exercises
The set of exercises below is aimed at stretching the muscles and will help you sit on both the longitudinal and transverse twine. Initially, warm up and warm up the muscles, only then proceed to the main lesson. In each statistical pose, initially linger for 30 seconds, gradually, with subsequent training, bringing the time to 3-5 minutes. All exercises, both static and dynamic, are first performed on one leg, then on the other, this will help to evenly stretch the muscles on both legs.
Exercise #1 
Sit on your heels with your back straight. Bend forward with your whole body, stretch as much as possible, trying not to tear your buttocks off your heels. Lock in this stretch for a few seconds. Return to starting position. You need to repeat these steps 10-20 times.
Exercise number 2. 
Sitting on your heels, spread them apart, buttocks should be between them. Spread your feet in different directions to the maximum possible width. Each time the breeding radius will be more and more. When performing the exercise, watch your back, it should be even.
Exercise number 3. 
From a standing position, lunge forward with your foot forward. At the same time, smoothly transfer the weight to the front leg, stretching the back leg to the maximum. Perform the exercise 5 times for each leg.
Exercise number 4. 
To make side lunges, for this you need to sink as deep as possible, spreading your legs as far as possible to the sides. Shift your weight onto one leg, fully align the other. Lock in and "spring" for a few seconds. Slowly change position, transferring weight to a straight leg, bending it at the knee.
Exercise number 5. 
Sit on the floor, legs and back straight, socks on. Grasp your feet with your hands and tilt the body forward, while not bending your knees. Maintain this position for as long as possible. Return to sitting position. To produce such slopes in 5-10 approaches.
Exercise number 6. 
In a sitting position, grab one foot with your hand, the second remains flat. Straighten the captured leg, lifting it up to the maximum extension of the knee. Hold at maximum straightening up to 30-60 seconds. Perform the same actions with the second leg. 5-10 approaches will be enough. The back should be straight when performed.
Exercise number 7. 
Sitting straight, place the foot of one leg on the thigh of the other. lower leg should be even. With your hand, reach to the tips of the toes of the outstretched leg, while the tension should come from the chest, and not from the head. Lock in this position until obvious discomfort appears. Change legs and do the exercise for 5-10 more sets.
Exercise number 8.
 From a sitting position on the floor with straight legs, bend one leg at the knee, transferring it over the other, fixing the foot on the floor on the outside of the thigh. Reach forward, clasping the foot of the outstretched leg with your hands. Having reached the maximum tension, fix the position for up to a minute. Change legs and repeat the steps. Perform in 5-10 approaches.
Exercise number 9. 
Sitting on the floor, connect the feet together, while trying to lower your knees to the floor. Performing the exercise for the first time, you can help yourself to lay your knees on the floor with your hands. With a straight back, try to touch your feet with your forehead, fix for a few seconds and return to the starting position. It is necessary to produce such tension in 10-15 approaches.
Exercise number 10. 
In a sitting position, stretch one leg forward, bend the other back. The foot of the back foot should be near the outside of the thigh. Tilt the body with a straight back forward to a straight leg, while helping yourself with your hands, holding the foot. Stretching to the maximum, return the body to its place and tilt it to the center, trying to reach the floor with your forehead. You need to make such movements in 10-15 approaches.
How to effectively and correctly sit on 3 splits: a training program
Can everyone sit on the twine?
Stretching workouts have no age restrictions, so everyone can try to sit on the twine. Another question is how quickly it will turn out, because in addition to the innate "ductility", the physique, gender and age of the person who is training should be taken into account.
The younger the person, the less time he needs to master the twine, and the exercises will be easier. It should also be noted that it is easier for women to stretch, since men are physiologically less flexible.
Twine also has contraindications. It is undesirable to seat children under 5 years old on it, as their muscles and tendons are still very weak. It is not recommended to conduct classes if you have the following diseases:
- (high blood pressure).
- Cracks, fractures, bruises in the hip area.
- Musculoskeletal disorders.
- Spinal injuries.
Why can't you sit on the twine?

It is noted that more than 80% of those who are “on fire” to sit on the twine stop halfway, without reaching the results. Therefore, having decided to stretch, do not give up regular classes, and if you can’t sit on the twine, then look at the possible reasons below, you may be doing something wrong.
- Impatience. One of the main "enemies" for stretch marks. It so happens that after spending several weeks on training and not getting the desired effect, a person is disappointed and leaves training.
- Lack of proper technique. In order to achieve your goal, you need not only to engage in daily training, you must perform the exercises correctly. If you do not notice a positive result after 2-3 weeks of training, it is better to resort to the help of a trainer.
- Presence of injury. Injured with stretch marks that are performed incorrectly, about 35-40%. Such activities lead to disastrous consequences.
Video from Laysan Utyasheva: how to sit on the twine?
If you decide to sit on the twine, then confidently go to your goal. Don't let small setbacks scare you, because stretching is not only beautiful, but also brings health benefits.
All men and women are interested in the most pressing issue on the Internet, how to quickly sit on the twine at home for a beginner? What is twine - this is not just a beautiful pose, but a spectacular pose, thanks to which you will get a huge amount of benefit. For example, someone who can sit on the splits will get a beautiful shape of the body, legs, back, press, especially the oblique muscles of the press, which look very nice. Twine will also help you in improving the spine, urinary system and intestines. Therefore, gather your strength and start working at home. There is nothing difficult, we turn on our favorite series or music and begin to stretch.
After a while, you will be able to surprise your friends with your flexibility and improve your body. It is also worth noting that twine exercises very useful for young ladies who are planning a pregnancy.
So, what are the types of twine:
- sagging;
- Vertical;
- Transverse;
- Twine on hand;
- Longitudinal twine.
Longitudinal twine- the lightest type of twine. And that's all, because it involves those muscles that work with simple walking. On longitudinal twine can sit down much faster than others types of twine at home.
How to sit on the twine for a month at home
Exercises for longitudinal twine at home
Exercise 1
First exercise This is the pose of a runner. Before starting a workout, always warm up well with regular exercises. Stand in front of you and take a few deep breaths and start working.
Lunge straight ahead and place right leg so that she was bent at the knee. It is important that the leg should be completely perpendicular to the floor. Palms must be rested on the floor. The head should look straight ahead or straight ahead. You should remain in this position for about two minutes. Then try to spring your palms so that the perineum is gradually tense.

Exercise 2
The pose is very effective and will give you a lot of pleasure. The hands up pose is a direct continuation of the runner pose. So, slowly straighten the body, bend the back, and straighten your arms in front of you. Try to reach as high as possible, but at the same time, without lifting your palms. Longitudinal twine exercises will help to effectively and quickly strengthen and stretch the legs and muscles of the perineum, which are very important before you sit on the twine. Also, the exercise is very useful for the spine. Breathe slowly, look straight ahead.

Exercise 3
This exercise is very effective in stretching the leg muscles. Also, do not forget that the split position must be done for each leg. Slowly lower your leg to the floor, and straighten the other back. Then, with your palms, try to rest against the lumbar region. Try to bend back deeper.

Exercise 4
Take a pose so that one leg is bent forward at the knee, and the other is straightened back. Place your palms at your sides with your fingers pointing towards each other. Straighten your elbows to the sides.

Exercise 5
This is a direct continuation of the above exercise number 4 for twine at home. Try to touch your chin to the floor.

Exercise 6
So, exercise number 6 is the conclusion of your workout to sit on the twine at home. Try to bring the knee of the back leg as close to the floor as possible. But do not forget that before this exercise you need to effectively warm up. The final pose is your attempt to sit on the longitudinal split, or try to sit as much as possible.

Cross twine exercises
Cross twine- This is a more difficult way to sit on the twine, but quite doable. Cross twine at home very good for health, it develops the muscles and joints of the pelvis. On time cross twine exercises the legs will take on a very beautiful shape and bring the lower back into a correct and healthy position.
The following cross twine exercise perfectly prepare the body until the very last pose. This position will not give in to you as quickly as the longitudinal twine, but if you train hard, then all your friends will be in shock, and the body will be healthy.
Exercise 1
Quite simple to perform is a deflection in the lower back. Spread your legs shoulder-width apart, and place your hands on your lower back. You need to stretch until you see your heels. If you want to pump up the press, then you need to put your hands on your stomach. But always be vigilant, if the body is not ready for stress, then let the stretch go a little.

Exercise 2
So take a break after the first twine exercises proceed with the second one. Take a deep breath and lean forward and only, then stretch your arms forward. The head should look straight ahead. Legs should be wide apart.

Exercise 3
The exercise is called a deep bend with palms on the floor. The legs should be so apart that you can fit your elbows and shoulders between them. Try to reach down as if you are reaching up. Do not immediately rush to become a guru and become in this position in a couple of workouts. Do everything gradually so as not to harm yourself.

Exercise 4
When the muscles are ready for stretching, you can easily already do the exercise with an emphasis on the forearms.

Exercise 5
One of the hardest exercises is the wide stance squat. Stand wide, raise your arms up. But turn the socks outward - in this way, the legs are very effectively stretched. Do deep squat but keep your back relaxed and even.

Exercise 6
You will not be able to perform this pose right away. Since it is a direct continuation of exercise five. Sit down in this position and stay like this for 30 seconds.

Exercise 7
Exercise is familiar to many since school. Side lunges. Slowly spread your legs, lunges on the left and on the right leg. The knee of one leg should be bent and the other should be fully extended. Perform 8-10 repetitions.

Exercise 8
Now we are approaching the twine itself. Spread your legs as far apart as possible. Then lean forward a little and keep your back exactly parallel to the floor. Then rest on your elbows.
Exercise is the last preparations for the transverse twine. Also in this position, you can rest your palms on the floor, and pump up your arms and abs.

Exercise 9
Before how do the splits, lower the perineum on the stomach and gradually straighten the pelvis, the socks should be pointing up.

It is important to remember that everything twine exercises at home very useful for the genitourinary system, intestines and spine. Well, and most importantly, twine is very beautiful and effective to change your appearance.
Liked? Tell your friends.
One of the most striking ways to demonstrate flexibility is the transverse twine. Every girl at least once, but wanted to surprise others and, first of all, herself with a stretch and impress. Twine is used in many forms physical activity- in dances, martial arts, and for artistic gymnasts twine is longitudinal and transverse and is a mandatory element of the program.
In order to sit on the transverse twine, you will need to make a lot of effort. But how beautiful!
The difficulty lies in the fact that the transverse twine is considered the most difficult type of stretching and for many it remains a dream due to insufficient perseverance or physique. Practice shows that it is not so difficult to realize a dream, because the main thing is to have a desire and strive to achieve your goal. Are you ready to make your wishes come true? Let's learn how to sit on the transverse twine.
On the way to the twine - five basic rules
Of course, the first time you won’t be able to say the magic “alle op” - and now you are already sitting in the splits. Let's start simple - with the basic rules that will be useful to you in the process of stretching.
We proceed to the main thing - to stretching on the transverse twine. Performing a simple set of exercises day after day, you will significantly increase your flexibility, which means you will come closer to fulfilling your cherished desire. Here are a few exercises that will allow you to warm up the muscles and tendons before the longitudinal and transverse twine.
Butterfly

The butterfly exercise will help you do the splits faster.
This exercise increases the flexibility of the groin tendons and stretches inside hips.
- Sit on the floor, bend your knees and connect your feet. Try to pull your heels closer to your body, and try to press your knees with your hands to the floor.
- Pay attention to your position - when performing the exercise, the back should be straight.
- In the butterfly position, place your hands in front of your feet and lean forward. The knees are pressed to the floor as much as possible, the back is straight.
Crap

Stretch your body to the floor with a straight back.
This exercise is very effective for stretching the back and inner thighs, as well as the hamstrings.
- Sit on the floor, spread your legs to the side as wide as possible. Legs should be straight and toes pointed up.
- Stretch your arms out in front of you and lean forward. Your task is to “put” the chest on the floor so that your body lies “like a pancake”. Stretch in this position for several minutes.
- Then, with your arms outstretched in front of you, stretch first to the left leg (ideally, the body should lie on the leg, and the arms should wrap around the feet), and then to the right.
- Do 5-7 sets of 10 tilts for each leg.
Touching the toes
This exercise focuses on the area under the knee. Stretching on the transverse twine will become possible after you work comprehensively on developing the flexibility of the lower body.
- Stand on the floor with your legs straight and feet together. Lean towards the floor - you should touch your toes with your fingers. Do not bend your knees, linger on each slope for 40-60 seconds
- You can also perform the exercise while sitting. The principle is the same - you should touch your legs with your fingers, your back should be straight, and your knees should be even. Once you have mastered the stretch, you should be able to wrap your arms around your feet.
We stretch our elbows to the floor
This is also a very important exercise, it can be performed immediately before sitting on the transverse twine.
- In a standing position, place your feet shoulder-width apart. Lean forward (legs are straight) and try to reach your hands to the floor. Your “maximum” task is to put your elbows on the floor.
- In a standing position (feet shoulder-width apart), try to grab your ankles. Bend over to the right ankle first, then to the left. Do this exercise for 5 sets of 10 reps.
We sit on the twine
Now, after you have done all the exercises, you can finally try to sit on the transverse twine.
- Squat down, put your hands on the floor in front of you. Now slowly spread your legs to the sides, trying to straighten them completely.
- Stay in this position for as long as possible, then return to the starting position. Let the muscles rest and do the splits again. Repeat the exercise 5-7 times.